Time to strap

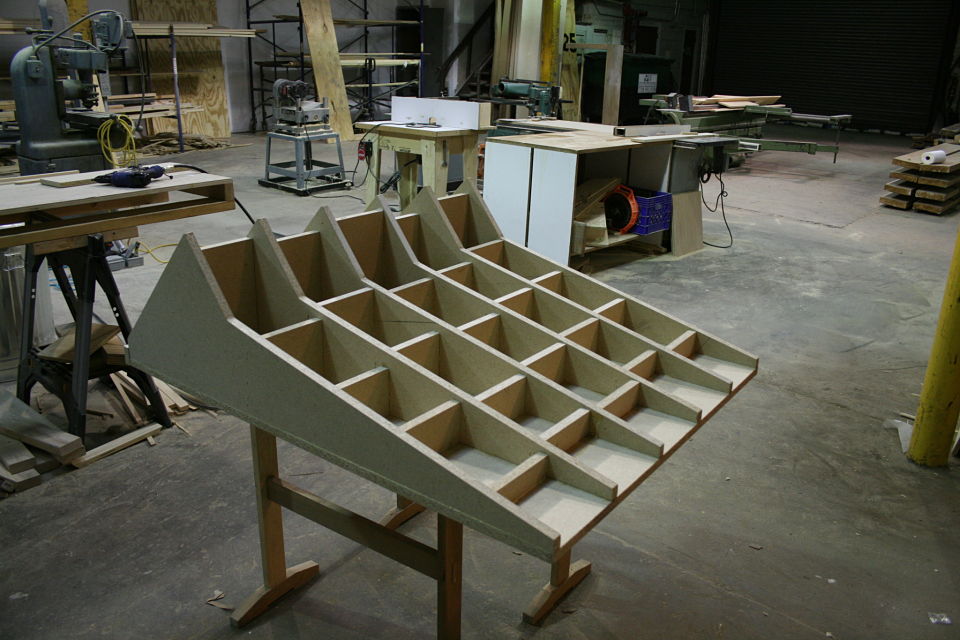
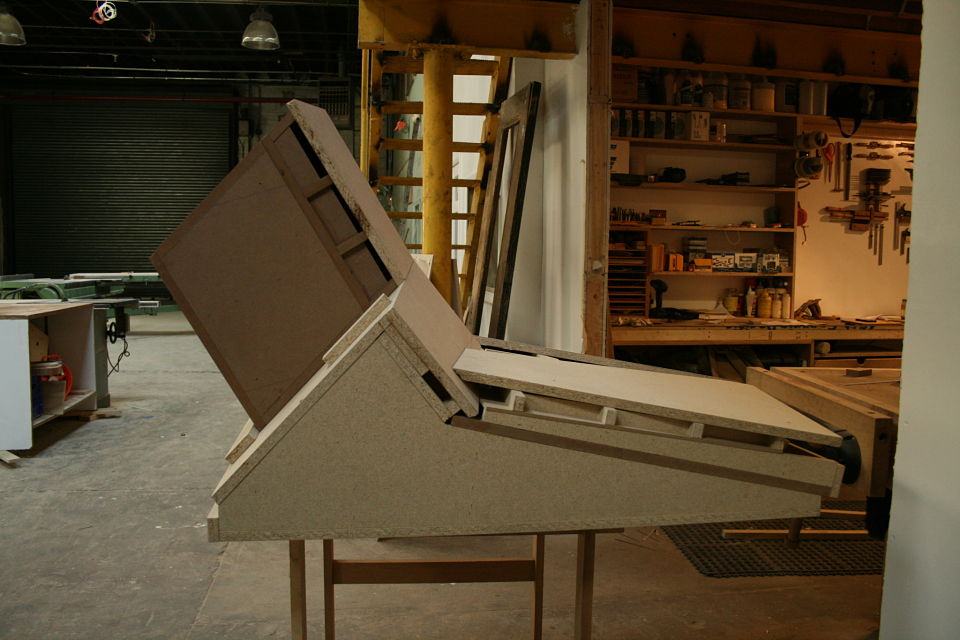
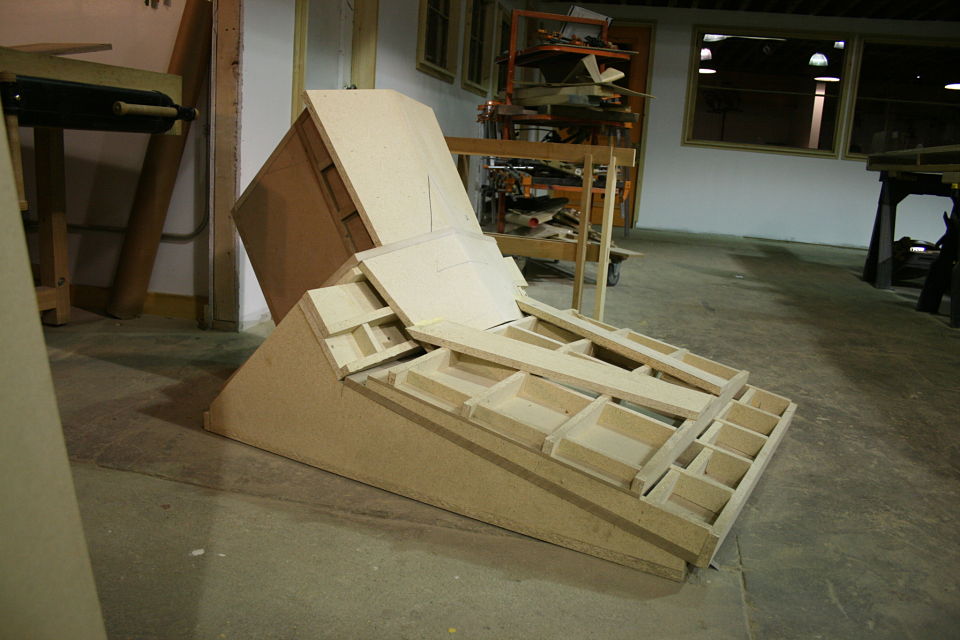
With the back legs / armrest and back of the chair pressed on the large original form it was time to sort out how to go about pressing the front legs. Faced with the same dilemma of trying to wrap veneer around the diameter of a pencil I looked for alternative ways to clamp around the curve from my original bends. The solution I came to was using a shim steel strap to create my clamping pressure around the outside of the tight radii. 

laminating.jpg
strap.jpg
straplaminating.jpg

So as you can see above the shim steel strap is attached to my plywood clamping cauls. It wraps around the far end of the bordering cauls and into a bandsaw kerf which is then covered with a block to keep the strap from slipping.  

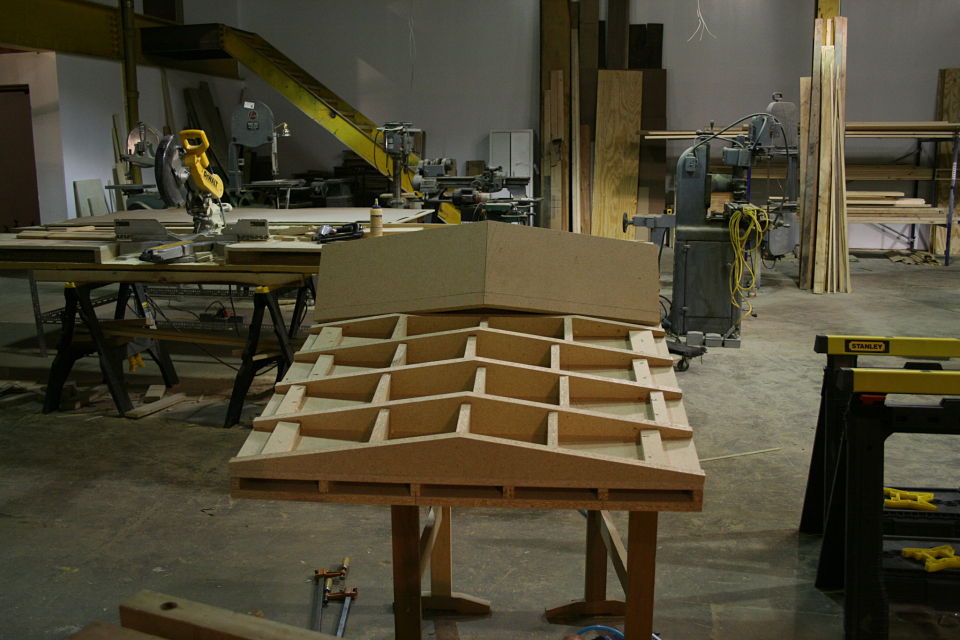
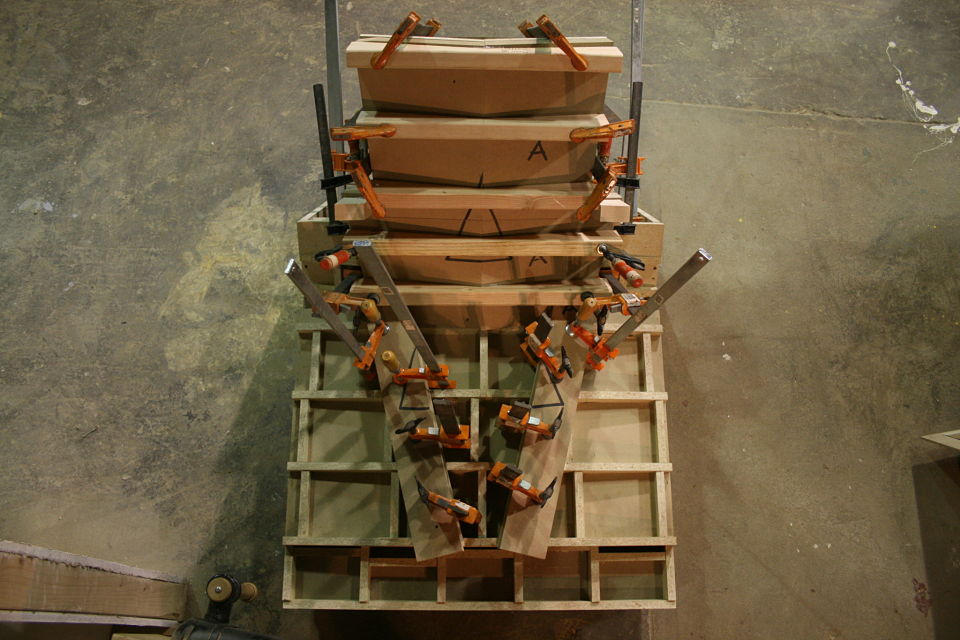
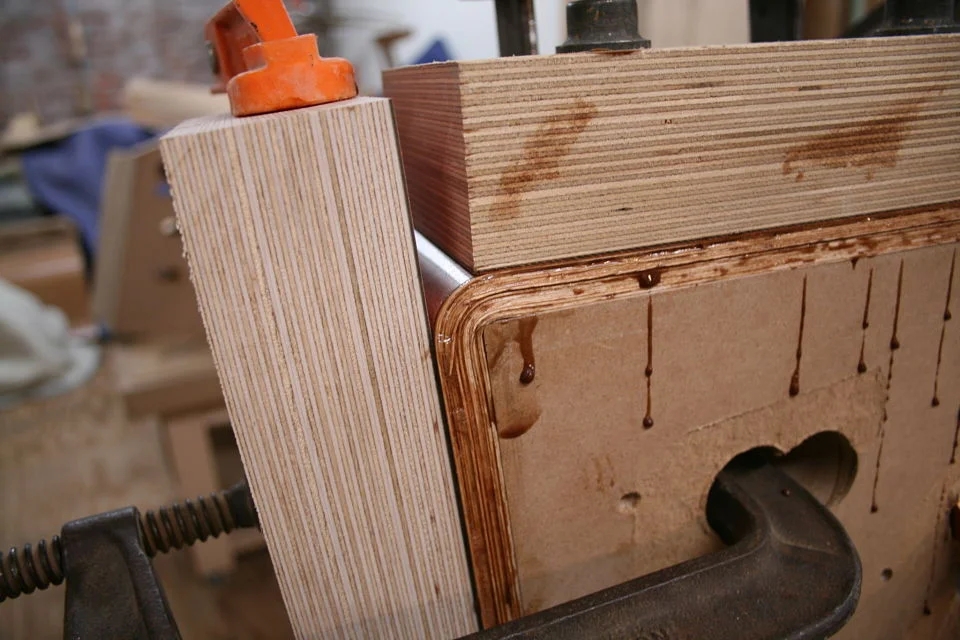
The 21 layers of veneer were cut to shape, the inside three layers were hot pipe bent around the bar of an F-clamp to prebend the tightest radii. 

veneerbending.jpg
bentveneer.jpg
laminating.jpg
woodbending.jpg
woodform.jpg

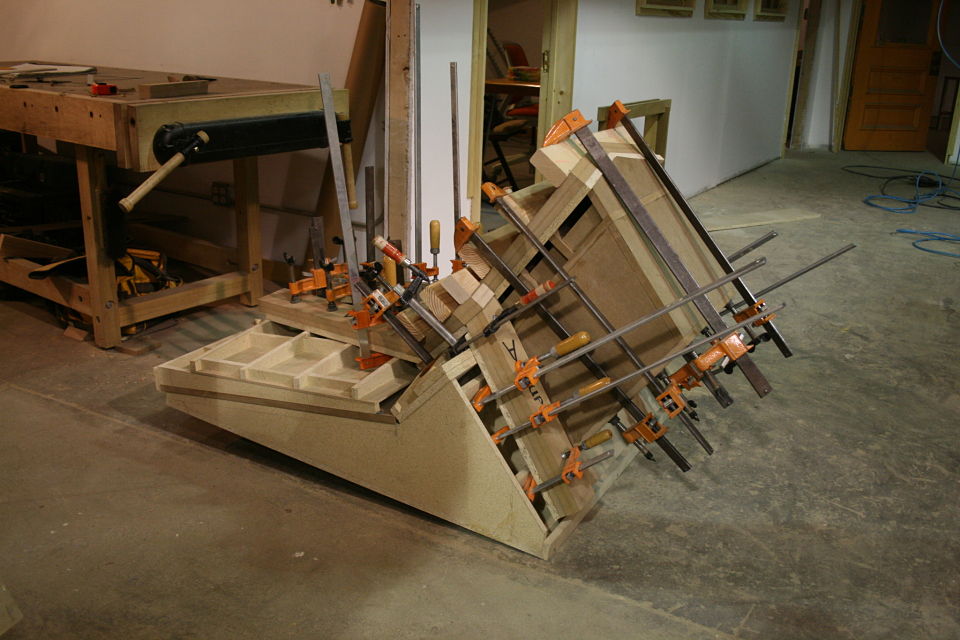
So you can see in the pictures above the two clamps that are clamping down the length of the cauls on either side of the bend, these are tightened at the beginning of the glue up to pull the strap tight around the corners where the blocks don't cover the lamination.

bentwood.jpg
woodbending.jpg

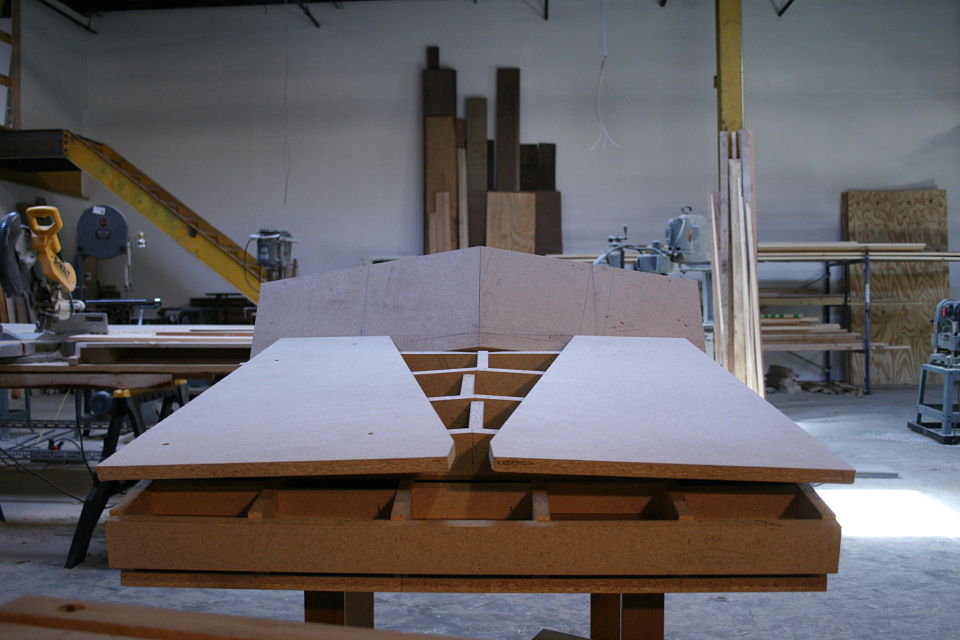
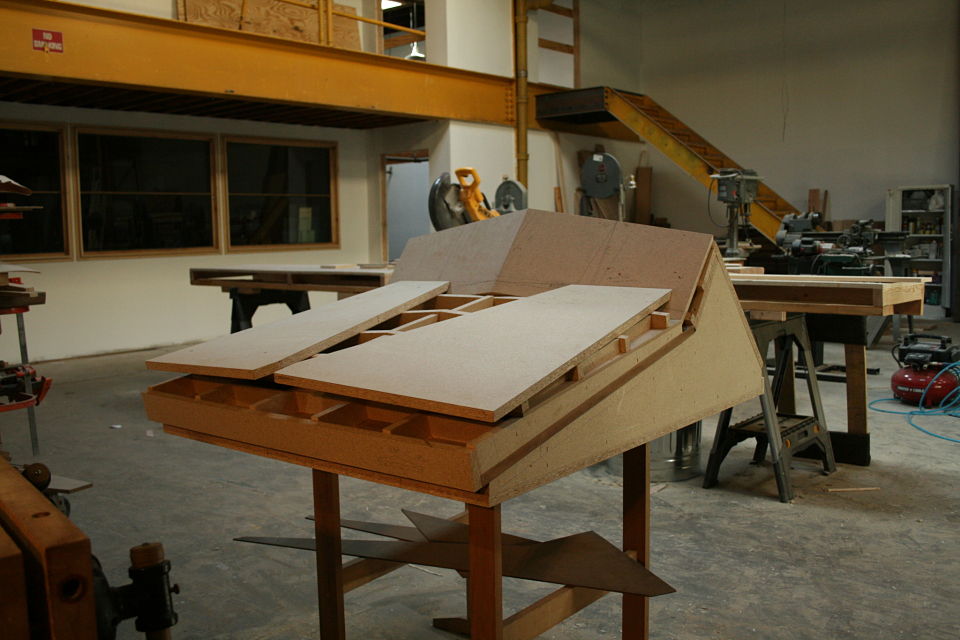
Like most chairs it required a set of lefts and rights, so two forms with complimentary angles were needed. They turned out better than expected and I was amazed at how well the strap technique worked. On to the seat and then lots of clean up and shaping. 


It Lives

It's been close to year since I had to admit defeat with the Origami Chair. The time I had available to work on it had run out and there was a long list of previously designed commissioned work with fast approaching deadlines. 

I am fortunate to have very understanding clients and Jed is no exception. So, after a long delay, we are back Origami Chair, and we have come to snatch victory from the jaws of defeat. 

That big form from last year did get used. We did attempt to press the back legs, back rest and arm rest as one complete panel, it didn't work. Maybe it was the expansion / contraction from the moisture in my glue with alternating grain, maybe it was a lack of pressure in certain parts of my form, the point of the matter is it failed. Love your experiments, calm your brain, move forward. 

Once back at the drawing board the decision was made to forgo the idea of a chair composed of just 2 panels (parts). A little bit of an adjustment to the original form and I was able to press the back legs, and arm rests separate from the larger back panel. Basically I would create what you see above in three pieces instead of just one. 

These are the parts I managed to make last year before having to move on. There was still a glimmer of hope that this could all work out. What came next was maybe the biggest personal wood bending breakthrough I have experienced. Laminating with a strap. 


You call that a form?

It has been quite the journey since proving the folded paper concept could work. I have gone through many, many sheets of particle board / mdf and more coffee than I care to admit. It has taken days to build, and days to refine and alter. This form could likely keep the building from flying away in case of a hurricane at this point. I am not entirely sure how I managed to sort it all out, but somewhere amongst the caffeine and sleepless nights  (possibly related) I sorted through the angles, and the angles where angles meet angles.

The form is composed of 6 separate torsion boxes. Together they give me the angles I require, or at least I certainly hope so.

With the form "complete" I needed to devise a clamping strategy (no way this contraption was fitting in the vacuum bag). A clamping caul system was the only way I could conceive making it work, and so the adventure of making an elaborate set of clamping cauls began. 1.5" thick mdf formed the platens (compound angles meeting compound angles) that would sandwich the veneer with "sprung" beams running across them. Because I won't be able to get a clamp into the center of the panel and I don't own any 12" deep clamps I needed to "spring" the beams. Basically the beams are touching in the middle (peak of the triangle profile) of the platen and around an 1/8" high on each end where the clamping pressure will be applied. As the clamps get tightened they will close that 1/8" gap creating more pressure in the middle of the platen. Simple stuff really.

This is the first of two forms that will be used to make the chair. This one will be used to create a bent ply panel that will form the back rest, arm rests and back legs.


IMG_6707_opt IMG_6719_opt IMG_6728_opt IMG_6730_opt IMG_6741_opt IMG_6746_opt IMG_6750_opt IMG_6752_opt IMG_6758_opt IMG_6774_opt IMG_6779_opt